Telstar

Telstar
Showing posts with label Telstar Turbo. Show all posts

Tuesday, 31 March 2020

Sunfire Red over Metallic Grey

To begin with, this update is a little out of date. Moving interstate and dealing with the issues of finding a house, settling kids and so on, meant that I haven't put the time in to keep it up to date. So lets take a step back in time.


The prep work was completed and the car was fully primed. Many hours were spent wet sanding the body and all bolt on bits, to ensure good adhesion of the fresh 2pac paint.


The car was wheeled into the booth, taped up, prep-washed and tack ragged ready to receive it's new paint. I couldn't believe it, after so many years, it was finally getting painted!


The paint purchased was Metalux and the colour chosen was off the original paint code MF. Sunfire Red, over metallic grey, with Clear top coat. Off the gun and still in the booth, the car looked amazing! The car was baked at 60 degrees before it was ready to be taken back to the shop for reassembly.


Fast Forward and it was 3 years since the Telstar had it's refresh of paint and the car was back sitting in my garage. Essentially it hadn't been touched due to work, family commitment and other projects. Thinking back to when it was painted, it looked fantastic in the booth, but there was some issues. Orange peel, dust and some minor adhesion issues, due to the repair and priming of the Uber rare USC fibreglass parts.

The whole car was flat sanded with 1500, 2000, then 2500 grit paper. Now I wish I had of gone down to 3000 grit to really remove some of those scratches, but for now we'll put that down as a lesson learnt..

Stay tuned for polishing updates!


Tuesday, 29 January 2019

Shedding some light on a dim situation

As many Telstar owners know, there headlights leave a lot to be desired. Even from factory, the light output wasn't fantastic, albeit better than their 626/MX6 cousin's. The reflector shape and size, combined with a H4 globe, meant you had the ability to light up part of your path. Nothing mind blowing here.
Now to add 20-30 years of degradation, ageing from weathering (many lived outsiders their entire lives) cheap repairs and water ingress.

Your once shiny reflector has now been hit with the ugly stick as the paint and chrome flake away from the housing. To add to this, your headlight has the newfound lighting output of a near on expired candle. Yellow, intermittent and not very bright.


So you own one of these cars and you're desperate to improve your ability to see in the dark. Well, you have a few options. Your first option is to buy new headlights. But who in their right mind buy a new headlight for a 30 year old Telstar? Well as it turns out, unless you're living in Indonesia, Malaysia or Taiwan, the answer is nobody. You can't source new headlights anywhere here in Australia. I've looked high and low, they can't be found.

So your next option is to buy 2nd hand. Fantastic! All you need to do is find someone wrecking a car and you're all sorted. Well.... Not really. Cars are usually wrecked for a reason, mostly because of their age. Most, if not all of the cars you see being wrecked, will have headlights in similar condition to yours, if not worse...


Let's turn the doom and gloom around for a minute and let's say you found what looks to be some good headlights. They're shiny(ish) and don't have broken lenses, so you buy them. But they seem a little odd.


We'll there's a good reason for that, my sub-optimally enlightened friend. Throughout the AT Telstars lifetime, there were 3 replacements available that I've managed to find so far. The best being the OEM equipped Stanley branded headlight. Instantly recognisable by their fantastic fit, nicely moulded plastics and good hardware such as mounting tabs and clips.

Stanley Headlights can be identified by the markings on the lens on the inner lower corner closest to the grill.


These offer perfect fitment and excellent quality. The down side is that being OEM they are expensive, so many people opted for the cheaper options when a minor fender bender dictated a Change in your night vision capabilities.


The next challenger is TYC. TYC Genera as they are formally known, is an aftermarket parts manufacture originating from Taiwan.


They offer OEM style replacement lamps for many makes and models. They are even original equipment supplier to International Trucks, Suzuki and Freightliner in the USA and to Mini and Ducati motorcycles in Europe.

TYC headlights can be identified by the marking on the lens in the middle at the bottom.


What does all this mean? It means they are the best aftermarket direct replacement headlights you can get. The reflector are as good as the Stanley items and all the plastics are nicely moulded. There are some inconsistencies when it comes to pattern sharpness, but this could be due to moulding techniques or even copy write laws. All the hardware is OEM quality. Everything fits nicely. There are no unusual defects. They are a good thing.


So what is the 3rd offering you say? SAP / NTY. These have no markings of origin, however they do have SAP and H4 on the glass lens.

SAP headlights can be identified by H4 and SAP markings on the lens.
They are horrible. The plastic moulding is terrible. Everything is deformed and not straight. The supporting webbing is deformed and there is flashing from the mould everywhere.


There is no mounting hardware for the reflector or the Parker light. "No problem, I'll use my original ones". We'll there is a problem, the globe mount for the parker doesn't fit.


But that's not all, the headlight doesn't fit into the car without making some "clearance cuts". Say what? Yep you heard me. Clearance cuts. You know, when you have to cut up your new headlight to get it to fit. Yeah that.. The guard side mount when aligned to the locating pin, doesn't. Fit.


PERFECT! So you managed to find a pair of surprisingly new pair of headlights, that now don't fit. Awesome..


There is another option however. The original, as well as aftermarket headlights, can be disassembled and repaired. The lenses, unles sthey are cracked or broekn, will only need a clean up and polish. The reflectors you have a few options with too. If the chrome is intact, they can be polished up. If not, you can have them rechromed. It isn't $20 cheap, but it isn't expensive either. The end result is new chromed reflectors!

Let's say you don't want to drop a couple of hundred dollars on a 30 year old car. Your next option is chrome paint or even liquid chrome. It is more labour intensive, because lets face it, you don't want to pay someone else to do it. So the more effort you go to and the better product you use here, the better the result.

Photo pinched from the Ford Telstar Owners Group Facebook page.

There is the reflector also the reflector trim piece which is chromed in the Stanley unit's and painted silver in the aftermarket ones. This is where you can introduce your creative flair. You could paint them in boring silver, or you could colour code them or even paint them black!!!! Doesn't this affect your lighting output, well. A little, but it's a damn sight better than your old busted, water logged yellow headlights, that's for sure!!!


What did I do you ask? In the past I painted them black and polished the reflectors housings. What did I do with the AT? I just found the best headlights I could, cleaned and polished them up internally and externally. The driverside is a Stanley unit and the passenger side is TYC. It'll do for now until I find something better.


Tuesday, 10 November 2015

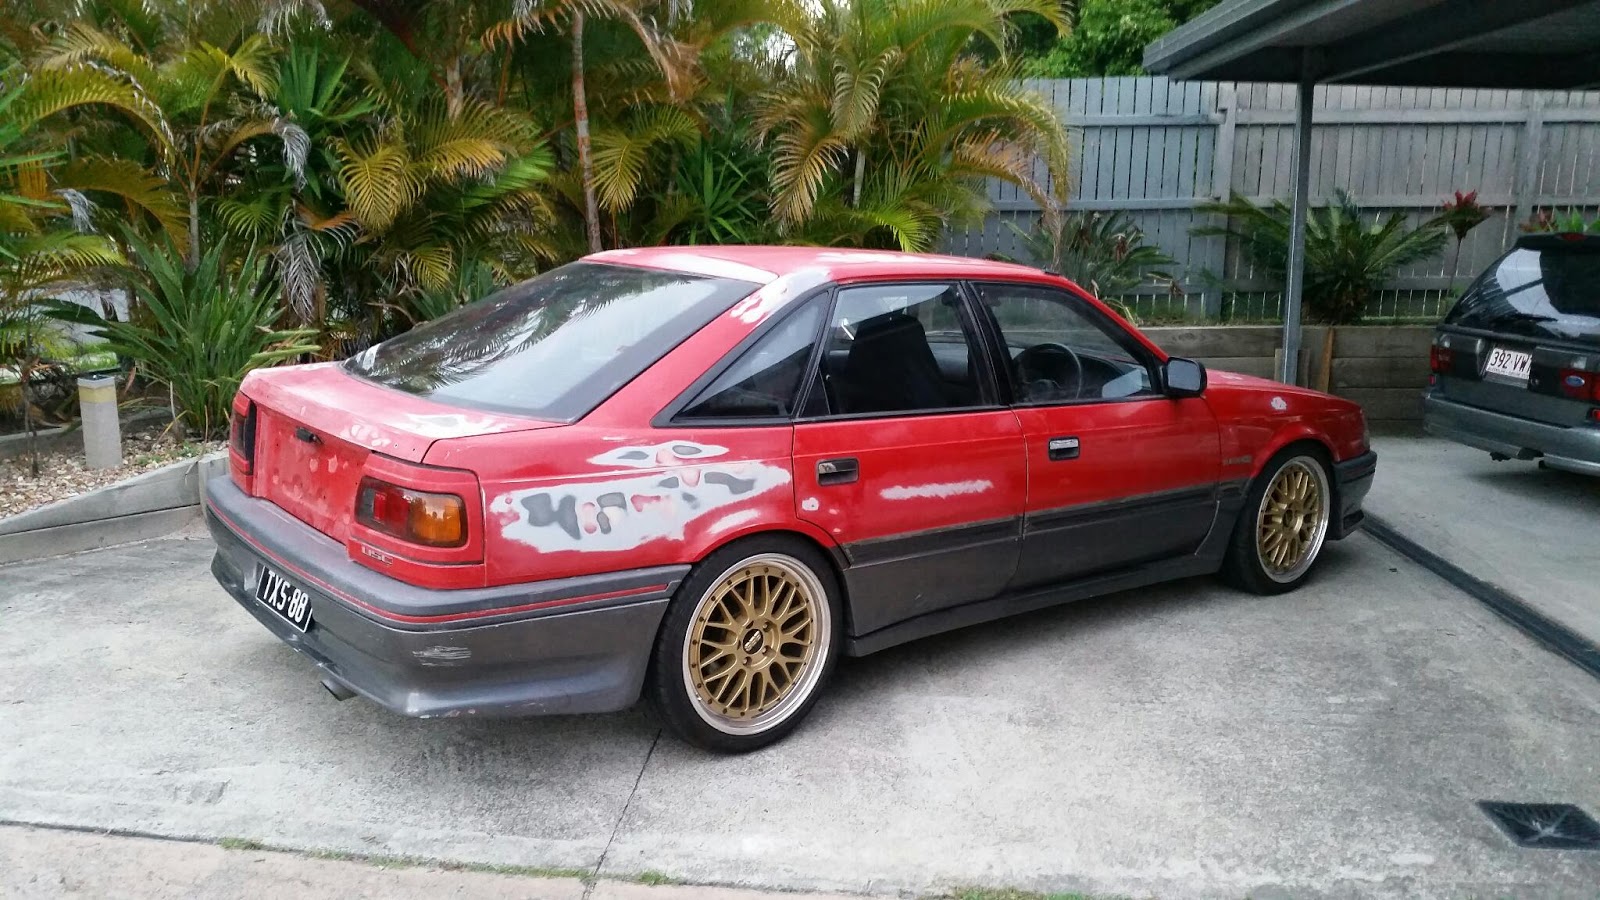
Panel and paint

The paint on the old girl was mostly original, besides the minor front end paint job, and is what you could call 'honest'. Dents, scrapes and the lingering signs of some intimate parking. 


Over the past 6 months, I've been spending some time in doing some much needed body repairs. The roof, bonnet and driverside rear quarter had received the majority of the 27 years of wear. The worst of these indiscretions were discussed in my blog entry 'Dents, Scrapes and Other Body Damage'.


The bonnet and roof received the most attention, due to the damage they had. 


A large dent resulted in some major ripples through the driver side rear guard even after the dent was massaged out. Too many hours went into correcting this.


Today, I did some final prep before it went off for final paint work, all door moldings, badges and unnecessary trims were removed before the car was driven to a mate who is painting the car.

As she stands before primer and paint.


A mate of mine was looking to get rid of some un-needed parts from his collection, to which I was happy to oblige. The old girl now has a pair of new tail lights.
 
New tail lights!
 
I'll be heading over the help with final strip down on Saturday before it gets rolled into the booth in the next week or so. I can't wait!

Wednesday, 9 September 2015

Understanding Telstar VIN and Build Plates


The VIN (Vehicle Identification Number) and Build plates gives the identity and build details of any specific car. Today all manufactures us an International standard 17 digit VIN, which have codes to represent the World Manufacturer Identifier (WMI), Vehicle Descriptor Sector (VDS) and the Vehicle Identifier Section (VIS).


The International Standard VIN was not enforced until the 1st January 1989, when all vehicles sold in Australia needed a 17 digit VIN to be eligible for registration. Further information on this can be found at the following:


Mazda and Ford used a 17 digit VIN but it is not a standardised sequence as per other manufacturers. The AT models (built Oct 87 - Dec 89) have a 17 digit VIN and there is a lot of Ford produced technical references to support this, however the early AT TX5 Turbos did not use them.

This is out of my 1989 Workshop Repair Manual, showing the VIN type of the Australian Delivered cars and all other Right Hand Drive models.


 Below is the breakdown for vehicles built for the Australian Market.


The Build plate is located on the bulk head of the Firewall. All Australian delivered AT/AV Telstars are all labeled as GD Models on the Build Plates. GD is the chassis designation for the Mazda equivalent. The AAA in the VDS is described as being all vehicles produced from Nov 1991, however this identifier was used as early as 1989 as per below.


The JC0 and the AAA was not used on early AT TX5 Turbo model build plates. Instead they used the SHW as the VDS with the remained being the VIS as per the international standard.


The VIN can also be found stamped into the bulk head of the fire wall.


Below is a breakdown of an early AT TX5 Turbo VIN, indicating what each digit represents.


The Year and Month charts can be used to verify built dates. in the above example, J and C are the year and month as seen under Built Date. 
 This is an extract from the Ford Body Repair Quotation Guide and can be used to verify Build dates:

"The chart set out below interprets the production year and month codes. The letters I, O, Q and Z have been excluded from the system to avoid possible misinterpretation of similarity with other letters. The monthly codes set out as follows are recycled every fifth year."

from the Ford Body Repair Quotation Guide

The Compliance plate is also located on the bulkhead of the fire wall, above the brake master cylinder and booster assembly. The ADR compliance plates were fitted to the vehicles once they had passed all requirements. It is not uncommon to see the compliance dates stamped a month after build date. They still retain the VIN as per the Built plate.


The AV Model build plates differ, in that they have the 17 digit VIN. The ADR Compliance plates also differ, in that they list the Approval number, the Category, but not the individual ADR numbers. 

Below is an example of this as well as the build plate from my old 1990 TX5 Turbo.


If you would like me to decipher your VIN/ Build plates, feel free to contact me.

Tuesday, 26 May 2015

Ksport Coilover installation

Once my coilovers had arrived, i was a little disappointed that the rear coilovers had rubber bushed solid strut mounts instead of adjustable camber plates. Rear camber can still be adjusted via the lower hub mounts.


After a bit of research, I had learnt that S13 silvia front camber plates shared the same upper stud mounting and in the correct orientation. I went on the hunt to find some camber plates to convert my new coilovers.


 I found a pair of adjudtable ISC camber plates for $40, the only issue was that the centre hole in the spherical bearing was 18mm instead of 14mm. I considered sleaving the bearing, but changed my mind once I found the bearings to be seized. The other issue is that I didn't have a suitable upper spring perch.


I happened to have some old D2 front coilovers which I was able to use the 14mm spherical bearing and upper spring perch with the Ksport coilover and ISC camber plate. The orange plate is Ksport, the purple is the D2's and the yellow is the ISC camber plate.


Adding the spherical bearing and spring perch resulted in the upper spring mount now being 15mm lower than with the solid aluminum top mount. To ensure the spring preload remained the same, the lower mount was moved 15mm lower.


Once they were all back together, it was time to install them into the car. The car was jacked into the air and placed on chassis stands.


Whilst in the air, it gave me an opportunity to check out the 26 year old sills and underside. The sills, lower pinch rails and  jacking points were in perfect condition. The inner guards and rails were also in excellent condition with no signs of damage, rust or repair. I also found that the rear jacking point has a sturdy brace behind the pinch rail which matched the profile of my chassis stands. 

Removing the original struts was straight forward and pain free. Almost every bolt looked untouched and was easy to remove. the Ksports were fitted up to the with guestimated height and camber settings. Once the car was on the ground with the BBS LM's trial fitted, it was looking great, however the car was way too low.


I've since made height adjustments twice. Measure the current and desired ride height and calculate the required hub mount change. Very much a calculated trial and error technique, but it does work.
 

I took the car for a spin around the block and the ride is fantastic. I can't wait to take it for a spirited drive.

Momo Cobra

In Japan, the TX5 was offered with a few different options, one included a Momo Cobra II steering wheel. 


The Cobra II wasn't an overly popular steering wheel and not many survived the 25 odd years. The original Momo Cobra was more popular and so there are more of them available, if you know where to look.  These were manufactured in Italy in the mid 80's though to the early 90's. A lot of these came as factory options on s lot of Japanese sports cars, ranging from Toyota's MR2 though to the top of the range TX5 2000DOHC GT Francorchamps [4WS].